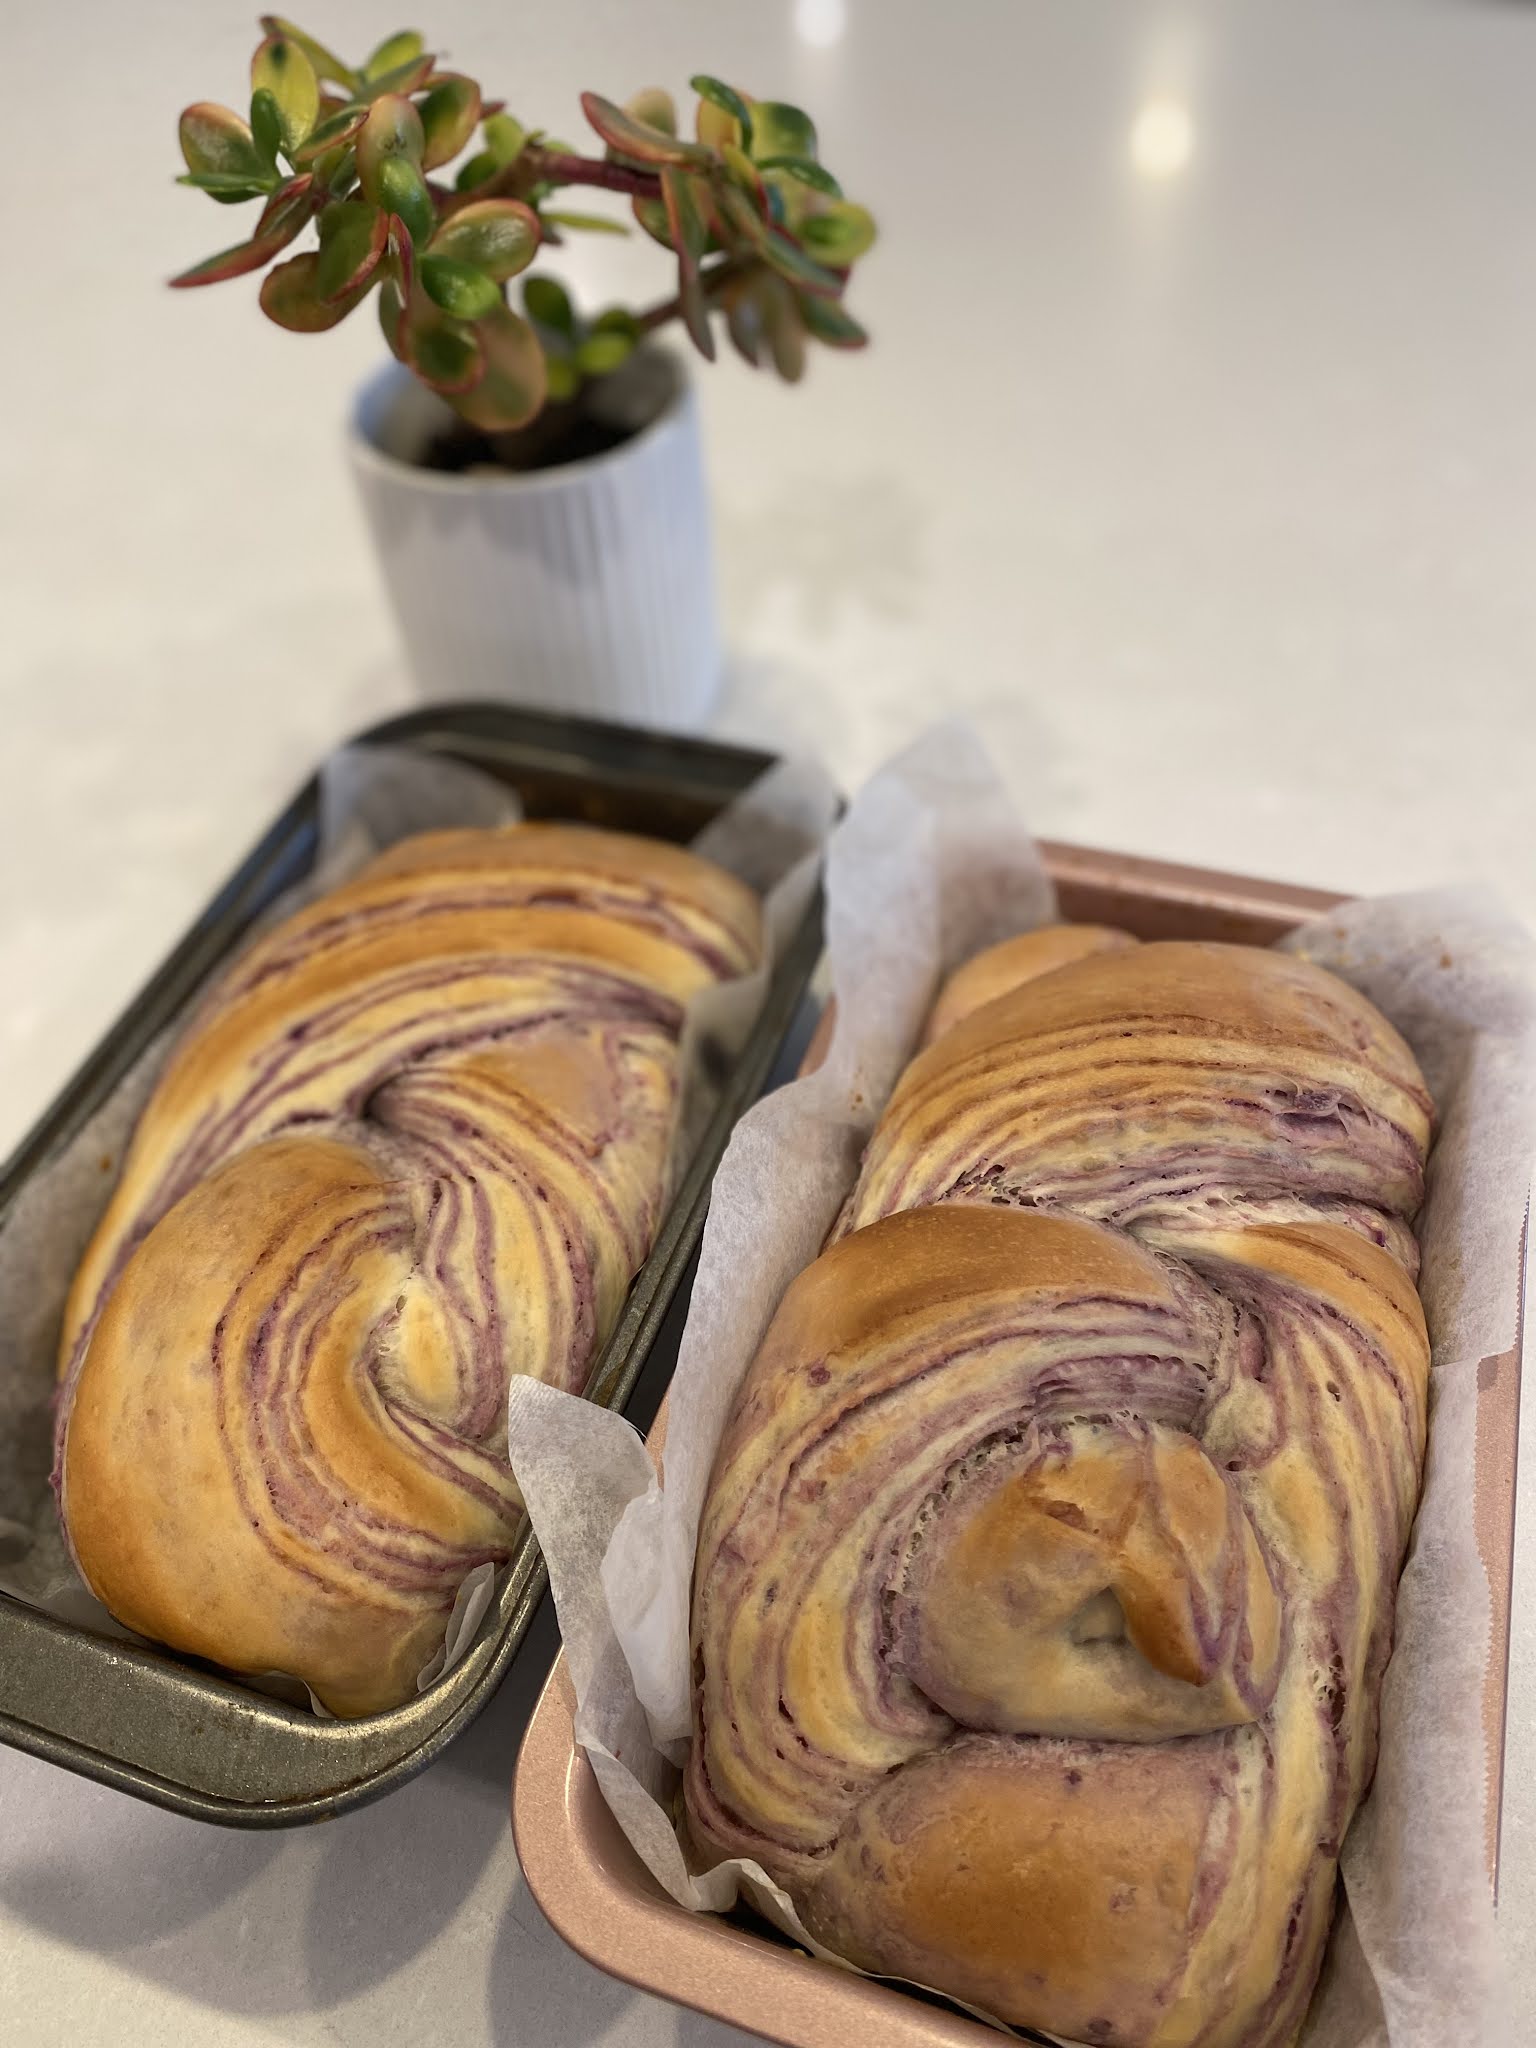
I found a few too many purple sweet potatoes in my pantry last weekend. These are some precious sweet potatoes and I really want to make good use of them. So happen that I bumped into a recipe on purple sweet potato swirly bread and that’s it! I’m gonna make my version of purple sweet potatoes loaf bread!
My main intention is to make a kids friendly bread that is healthy and delicious. This bread looks so beautiful, smells so good and has a perfect balance in taste. My family (including the baby) loves this bread!
Okay, here goes the recipe!
Useful tips:
- Chilled sweet potato sheet will ensure a successful shaping or the bread. Make sure your sweet potato sheet is well chilled before using it.
- Patience is key in ensuring you have a fluffy bread. Allow additional time for proofing if your bread did not achieve the desirable size.
- The ideal temperature for bread to proof is about 26C with 75% humidity. However, I find that my bread proof best (within the time frame) at about 40C for first proofing and 45C with a bowl of hot water to create humidity for second proofing. You may experiment through some trials and errors here.
Ingredients
Purple sweet potato paste
120-130g purple sweet potatoes, peeled and cut into pieces
1-2 tsp castor sugar
15g unsalted butter
Bread loaf
200g bread flour
20g caster sugar
3g salt
3g instant yeast
35g yogurt
100g water
20g unsalted butter
Method
Sweet potato paste
Use 1 medium sized Australian purple sweet potato to make one loaf of bread. I used two sweet potatoes here to make two loaves of bread. You should have about 120g-130g of peeled and cut sweet potatoes for one loaf of bread.

Steam the sweet potatoes in a steamer. Steaming is better than boiling as it retains more flavour in the sweet potatoes without acquiring additional water from boiling.
Once the sweet potatoes are cooked (poke with a fork to check), mash the sweet potatoes in a bowl while they are hot. Add sugar and butter and mix well. Make sure your mixture has no lumps. You should have around 140g-150g of sweet potato paste at this stage.
Place your mashed sweet potato mixture onto a piece of baking paper and cover it with another sheet of baking paper. Flatten the mixture using a rolling pin to make a slightly rectangular shape, with about 5mm thickness.

Place the sheet (with baking paper) into the fridge for chilling. Meanwhile, you may start making your bread.
Bread making
Mix all dry ingredients (flour, sugar, yeast and salt) in a mixing bowl. Make a well in the middle and add in yogurt and water into the mixture.

Mix the mixture using a hand mixer or a stand mixer until ingredients are well combined. Add butter (cut in small cubes) into the mixture and continue mixing using the hand mixer or stand mixer.
Depending on the flour you use (some flour retain moisture more than others), add a little more flour to the mixture if it is too sticky like this:
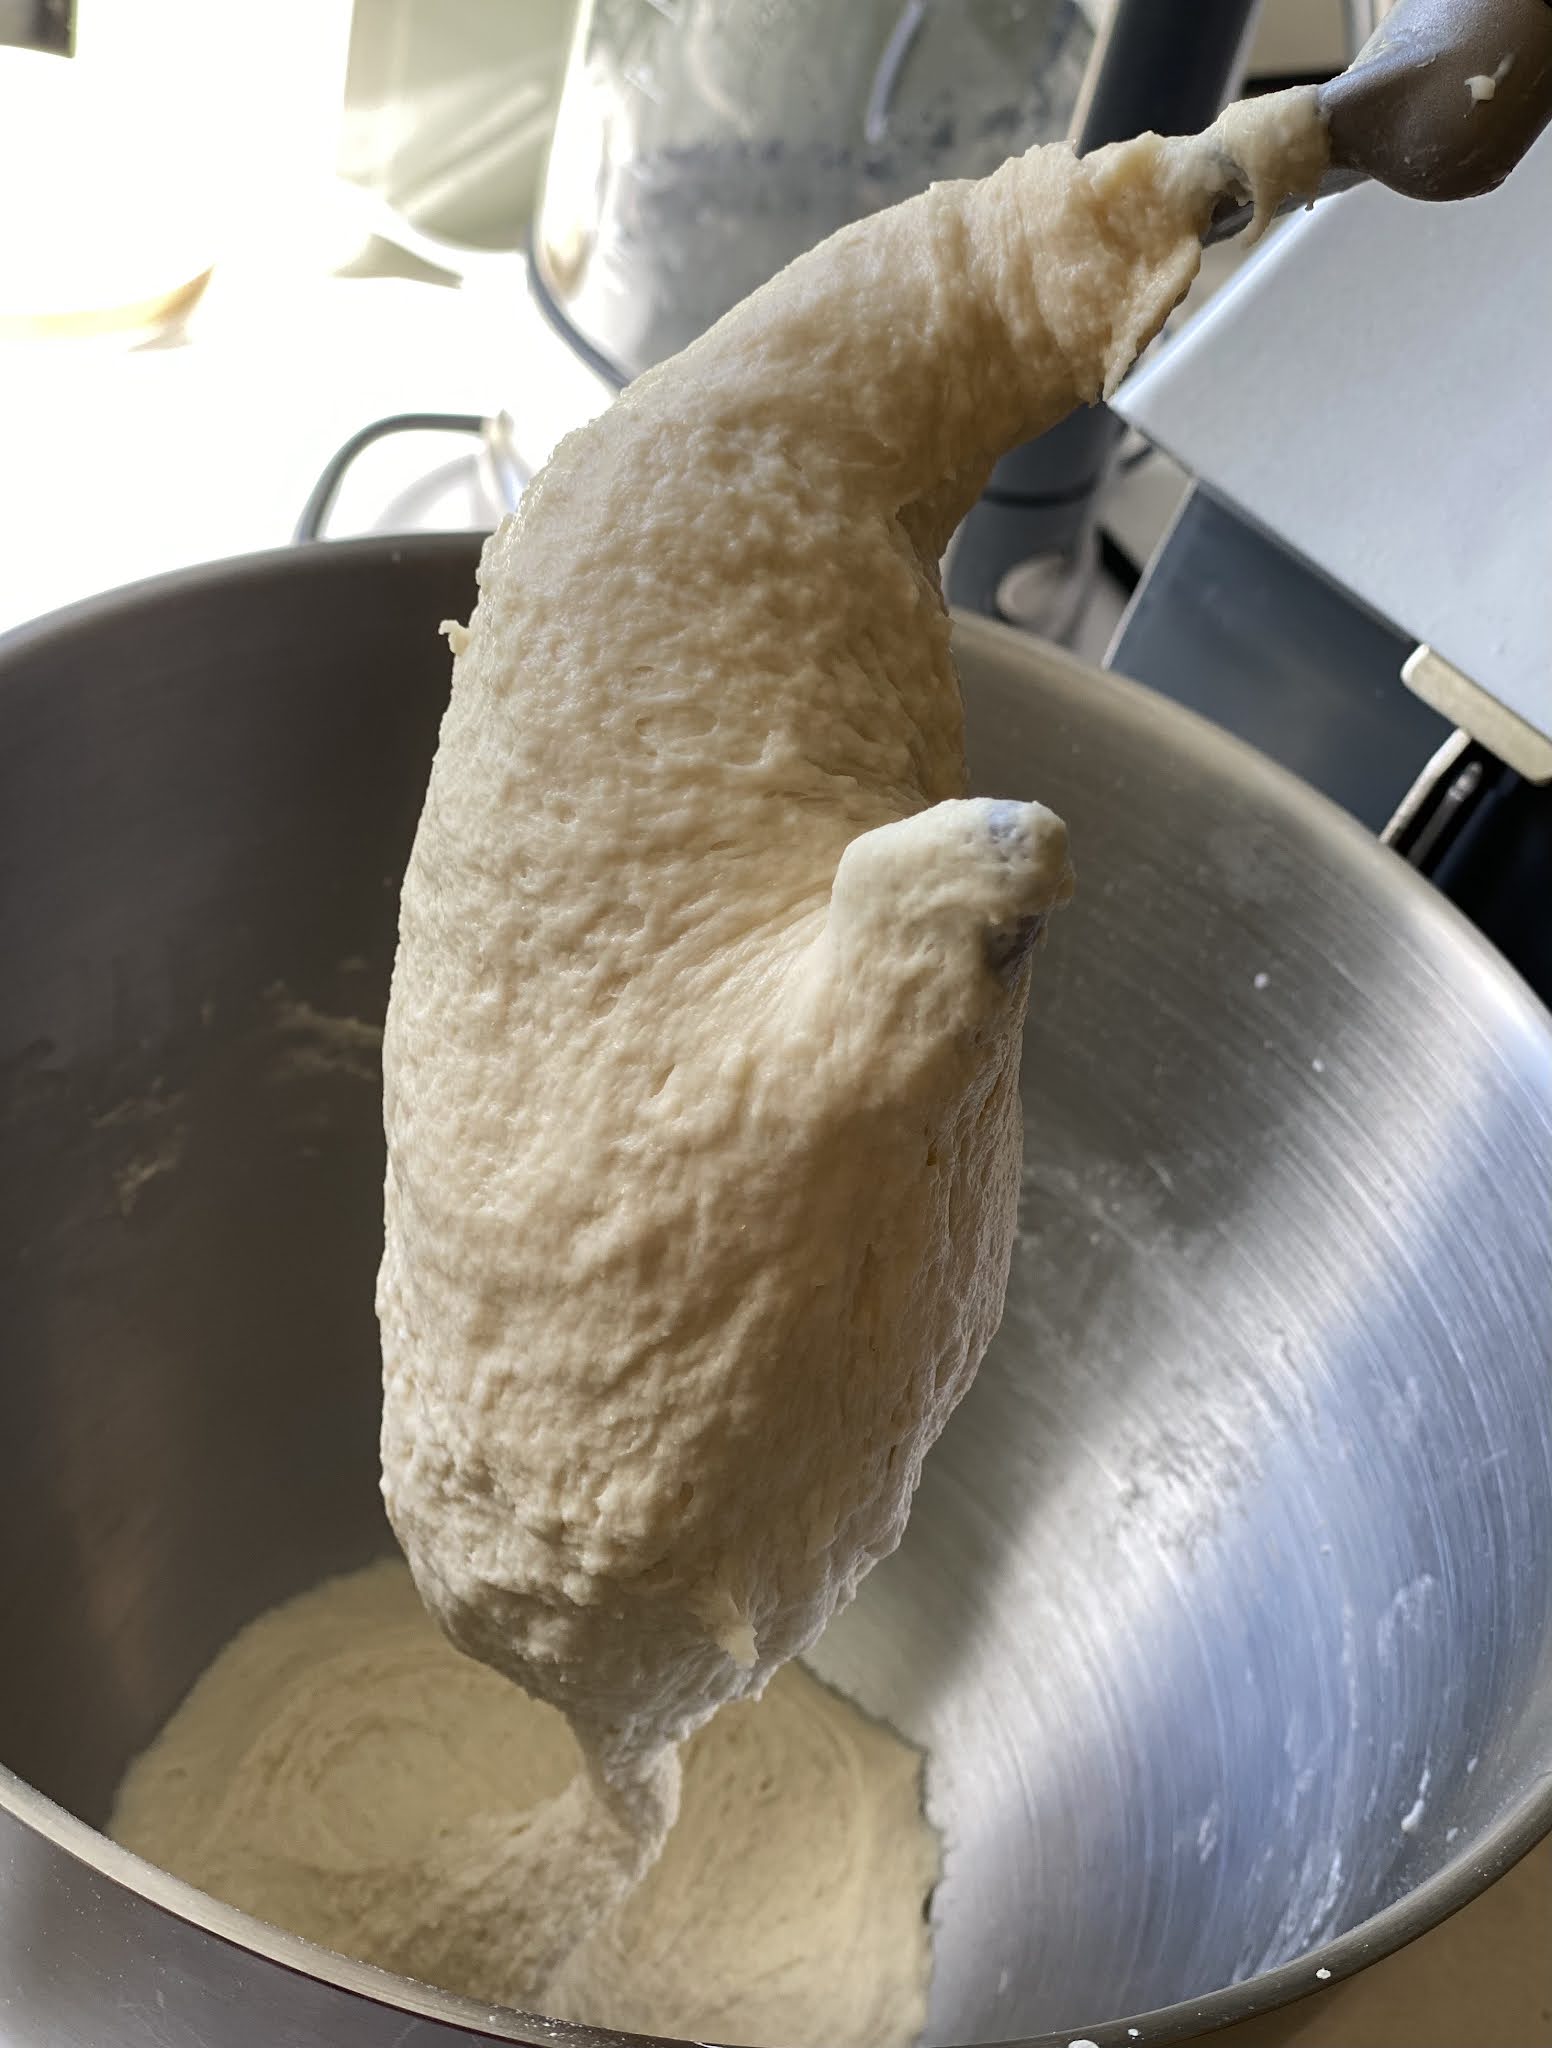
You need to achieve the texture below to ensure the bread mix is ready.

Spread a little flour on your working bench or you may use a pastry mat, take the dough out of the mixing bowl and using your hands, knead the dough until it is smooth on the surface.

Roll the dough into a round ball shape, return it to the mixing bowl, cling wrap it and put the bowl into a warm and moist place for first proofing (about 1 hour). I usually use the preheated oven (about 30C - 40C) as my proofing environment since Melbourne weather is usually quite cold and dry.
Check on your dough after 1 hour (sometimes you need slightly more than an hour), and if the dough is 1.5 - 2 times the original size, it is ready!

Take the dough out of the mixing bowl and place it on the floured bench or a pastry mat. Punch the dough with your fists for the air to come out. I learnt this from professional bakers.
Roll the dough with a rolling pin (or any cylinder shaped bottle) into a square shape of about 5 - 10mm thickness.

Place the chilled sweet potato sheet onto the dough and wrap it up.make sure the joints are stick together to avoid holes.


Use the rolling pin to make the dough even but don’t press it too hard. Then fold the dough in thirds, like this:


Roll the folded dough slightly with the rolling pin until the length is similar with your baking tin. Then cut the dough into 3 strips, leaving the top uncut.


I normally place my dough into the preheated oven for second proofing. Your ideal temperature should be 40C-50C with moisture. Hence, I also insert a bowl with boiling water at the rack underneath my dough during second proofing. Let the dough proof for 1 hour until it is almost 1.5 to double of its original size.

Place your bread into the oven when your oven is fully heated up (important!) and bake for 30 minutes. When your bread is ready, you can gently pat on it and it should gives you a hollow sound. Slice the bread when it is fully cooled down and enjoy!~


Look how beautiful it is! 😍
Comments